How to create QR code tickets
A complete guide on how to create events, get QR codes, download and more!
1. Event Creation
Creating an event on Dbook is quick and easy!
Follow these steps to set up your event and start selling tickets:
-
Step 1: Log In or Sign Up
Visit Dbook and log in to your account. If you're new, sign up by providing your details and verifying your email/phone number.
-
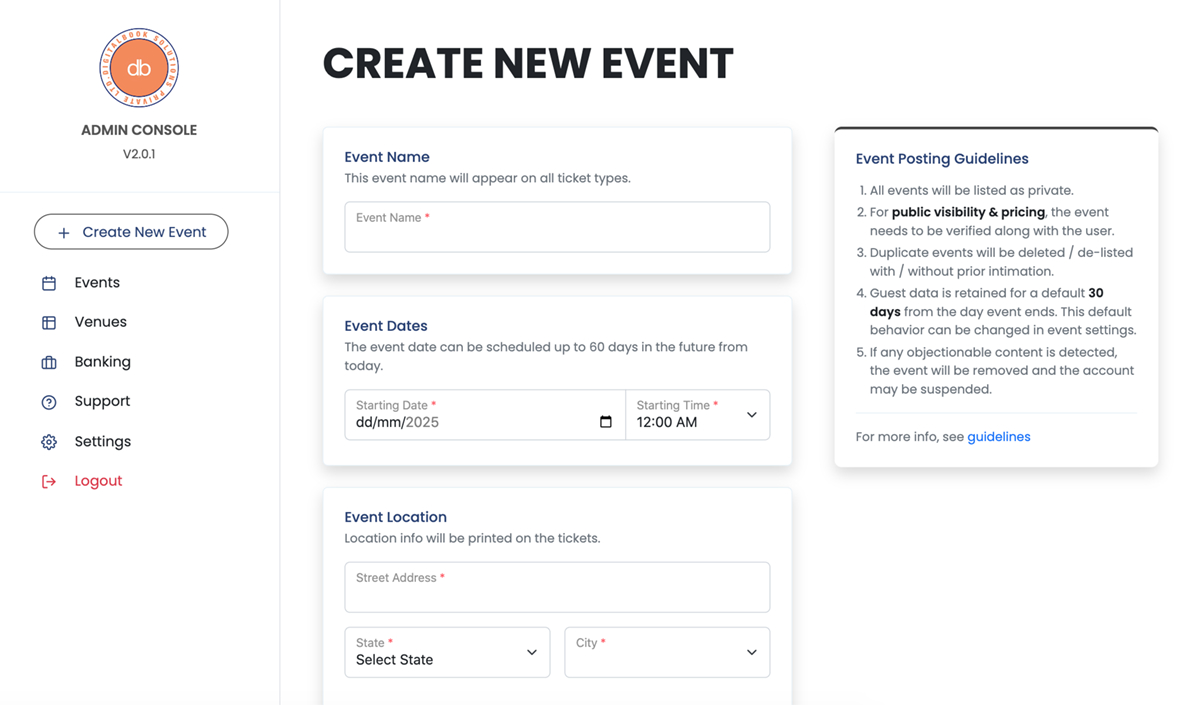
Step 2: Start a New Event
Click on “Create Event” from your dashboard. Enter your Event Name, Date, Time, and Location.
2. Additional Features
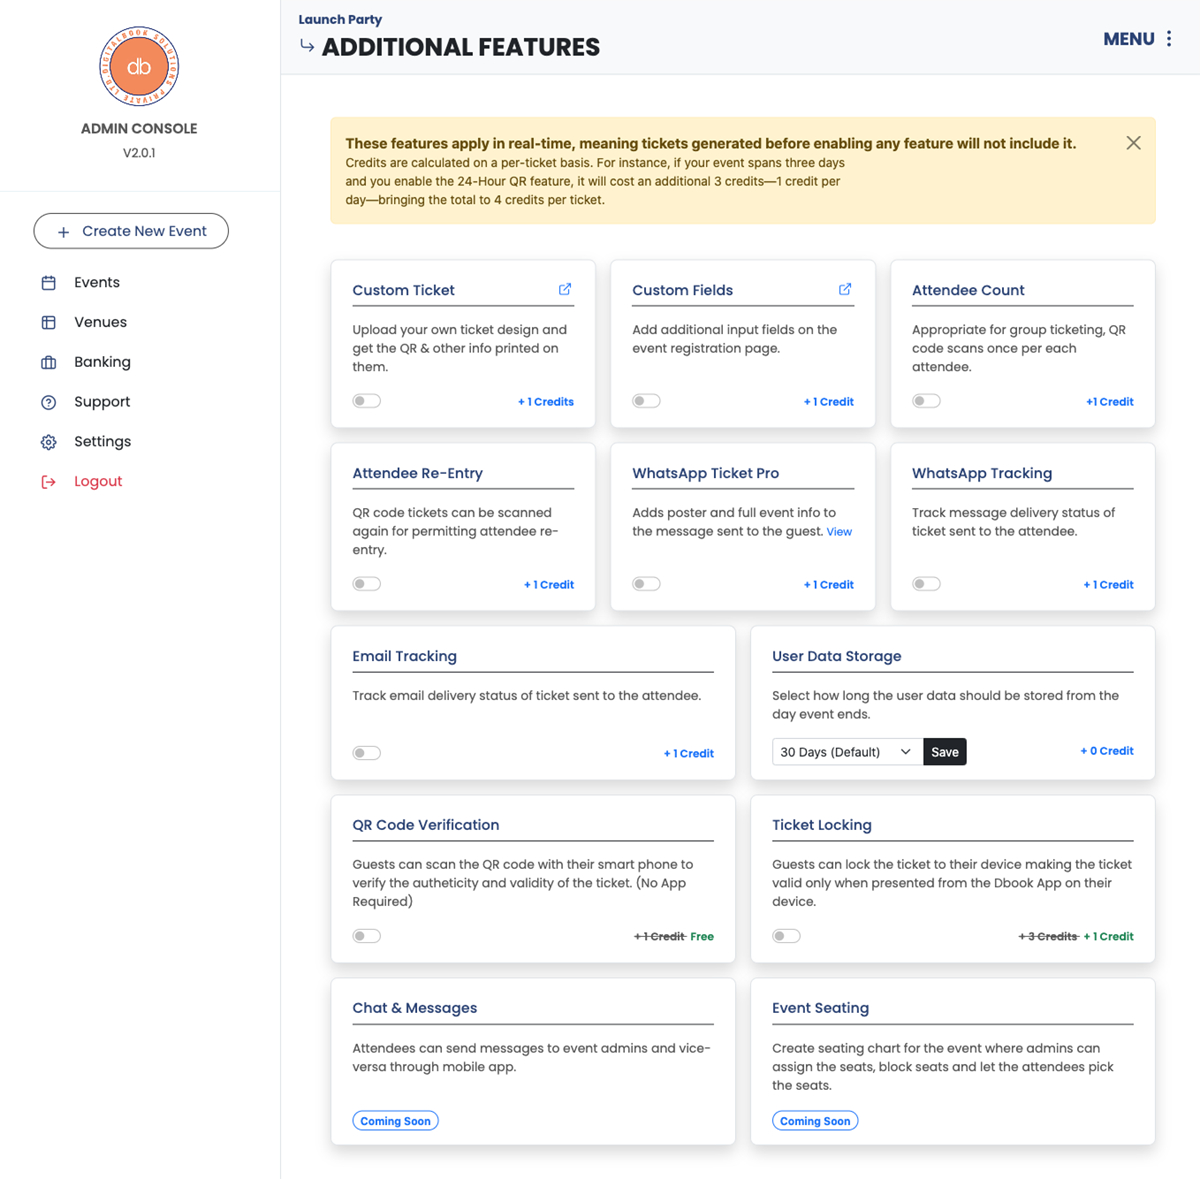
The Additional Features section lets you toggle advanced ticketing options. Most settings will apply to tickets created after they are enabled, and will stop applying once disabled
-
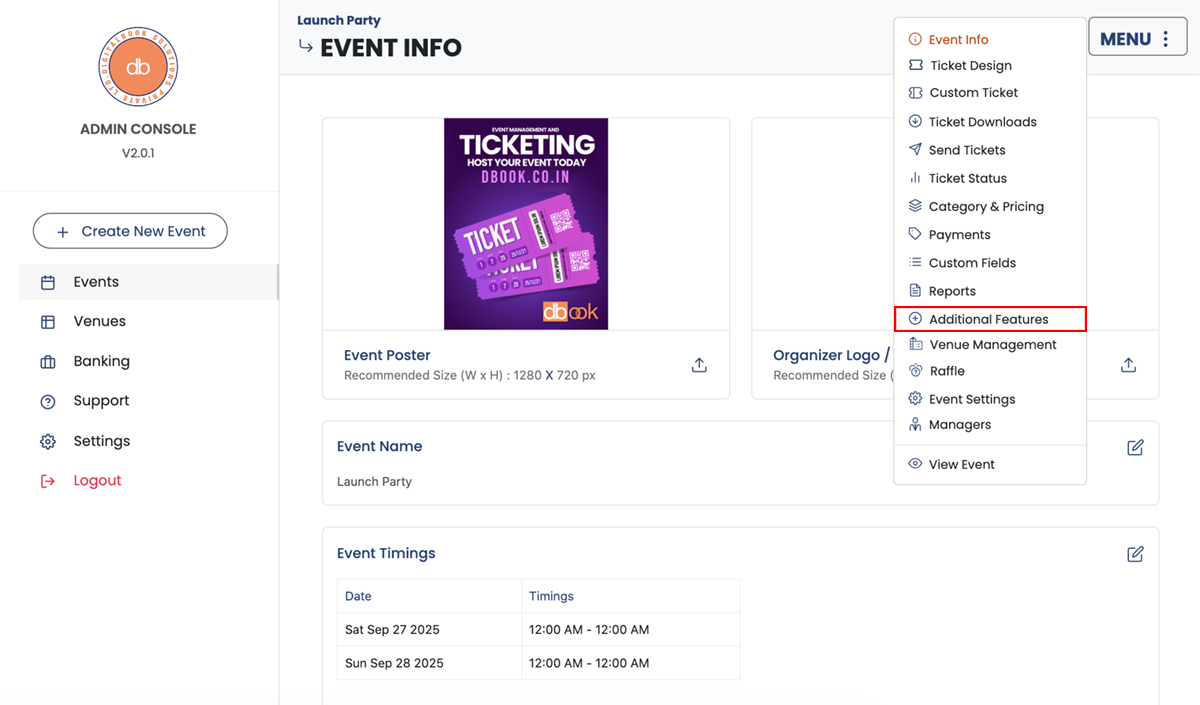
Step 1: Click the menu button located at top right of the event page
-
Step 2: Additional Features Page
-
Custom Ticket : When enabled this feature lets you upload your own custom ticket design.
-
Custom Fields : If you wanted to collect additional information from the guest while registering for the event, enable this option.
-
Attendee Count : This option is ideal for groups. When enabled, the same QR code can be scanned once per guest, keeping track of the count and allowing you to authorize entry even if not all group members arrive together.
-
Attendee Re-Entry : When enabled, this feature helps you handle cases where a guest leaves the event temporarily and needs to re-enter.
-
WhatsApp Ticket PRO : Choose between two WhatsApp message templates: Default and Pro. With Pro, your event poster is automatically included when delivering tickets to guests.
-
WhatsApp Tracking : Enabling this option allows WhatsApp message tracking, recording analytics like read, delivered, and failed. Only tickets issued while the option is enabled will be tracked.
-
Email Tracking : Enabling this option allows email tracking, recording analytics like read, delivered, clicked, bounced, delayed etc. Only tickets issued while the option is enabled will be tracked.
-
User Data Storage : By default, guest data is kept for 30 days following the event’s conclusion. Use this option to extend the data retention period as needed.
-
QR Code Verification : The QR code on the ticket can be scanned using any smartphone or QR reader app. A link will open to display the ticket's validity status
-
Ticket Locking : With Ticket Locking, a ticket is locked to a specific mobile device. The user needs to download the app, log in using their email, and enable the ticket locking feature. This prevents anyone except the authorized user from being verified, even if they possess the QR code. The QR code functions only when dynamically generated by the designated smartphone
Caution: Locking a ticket to a device is permanent. The ticket cannot be unlocked or locked to another device afterward.
-
Chat & Messages : Feature Coming Soon!
-
Event Seating : Feature Coming Soon!
-
3. Custom Ticket Design
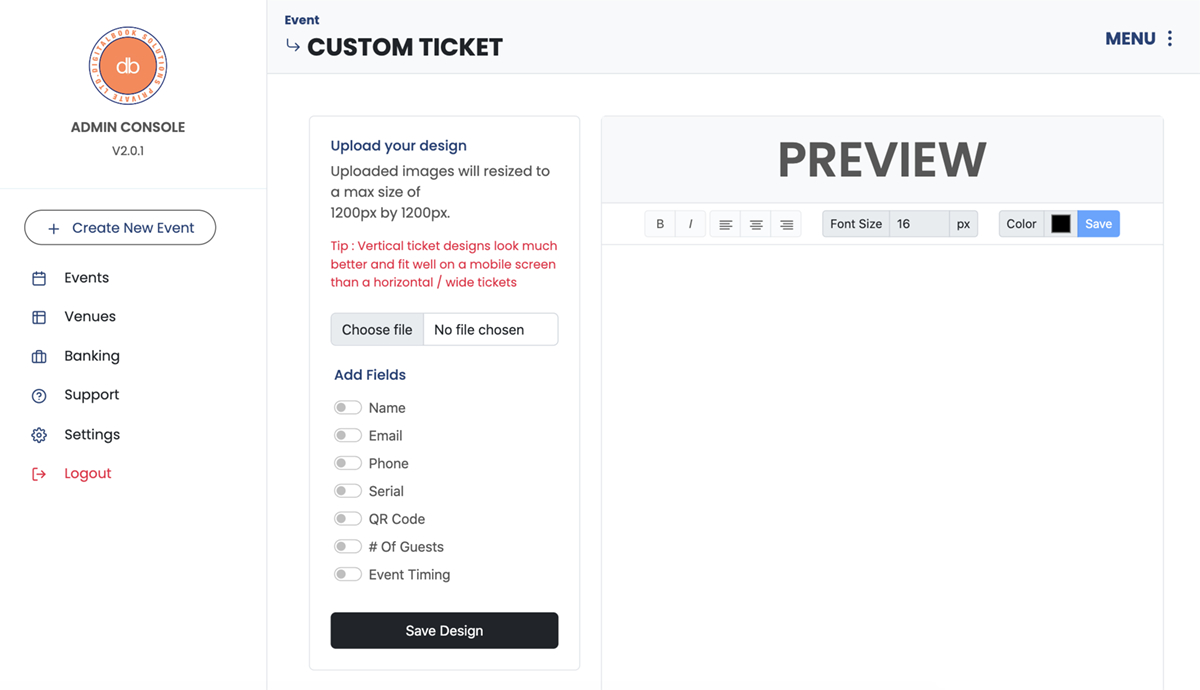
After enabling the option in the additional features page, navigate to cutom ticket tab.
-
Step 1: Upload
Upload your ticket design to view it in the design pagel.
-
Step 2: Add Fields of interest
Customize your ticket by adding fields such as name, email, phone, QR code, serial number, etc. Drag and position each field as needed, and adjust the color, font size, and style to match your design.
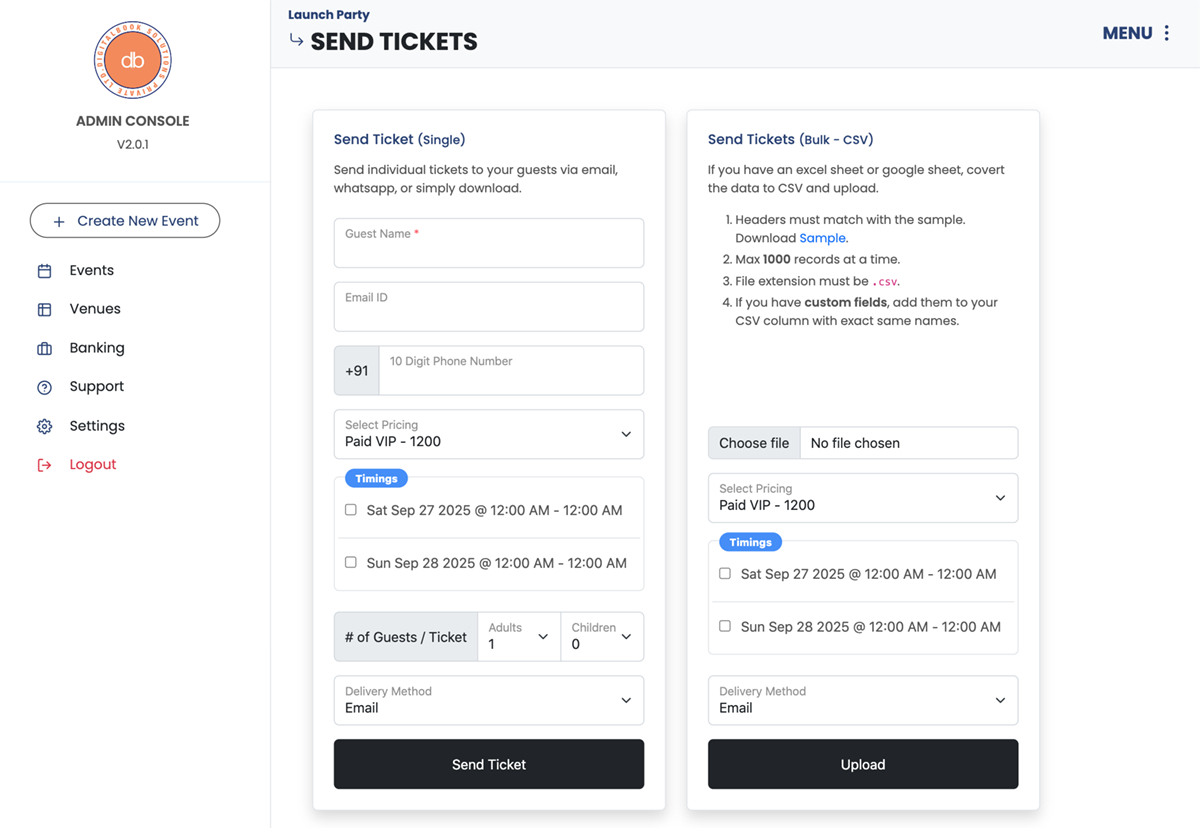
4. How to Send Tickets
Dbook supports several ticket delivery options, including Download, Email, and WhatsApp. Send tickets individually or upload a CSV file to send them in bulk.
-
Select the
Send Ticketstab from the menu optionsSelect the ticket delivery method that suits your needs.
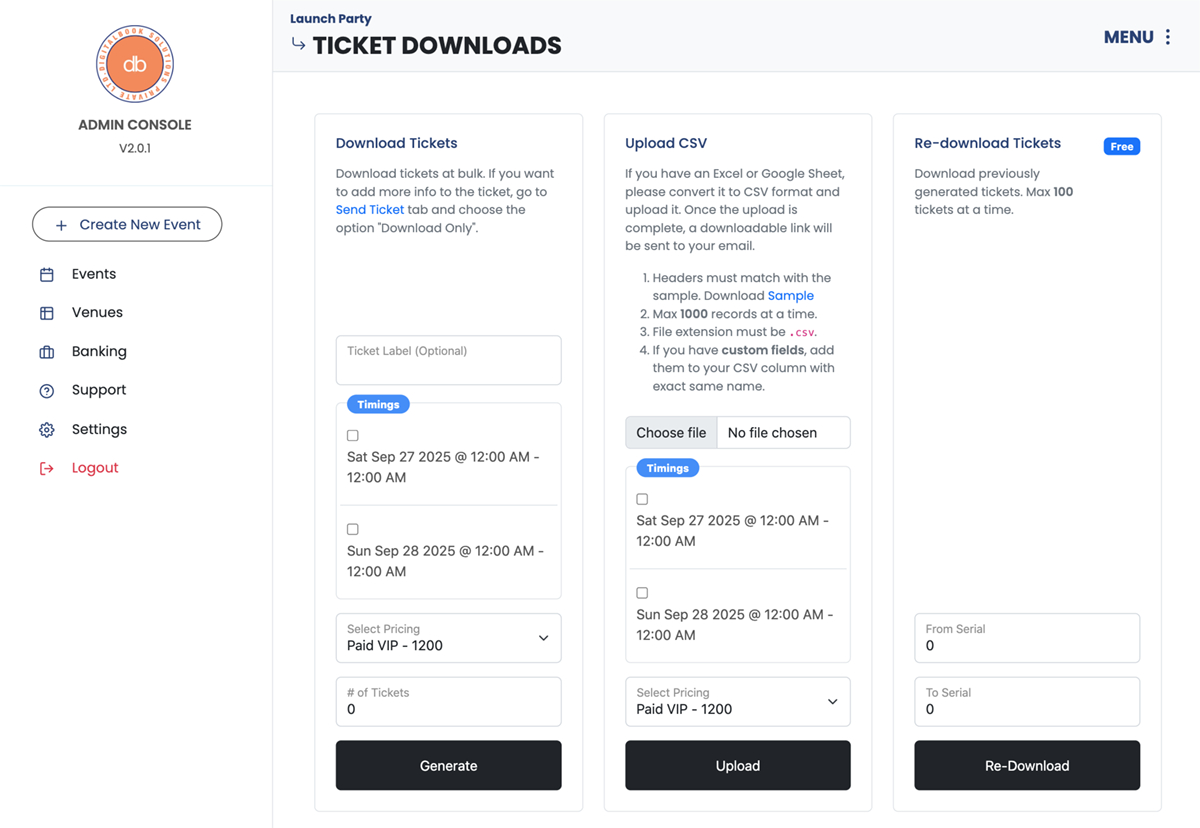
5. Download Tickets
There are two options: download tickets in bulk with minimal customization, or upload a CSV file containing your guest list. Ensure the CSV headers match the provided sample.
-
Select the
Ticket Downloadstab from the menu optionsSelect the ticket download method that suits your needs.
-
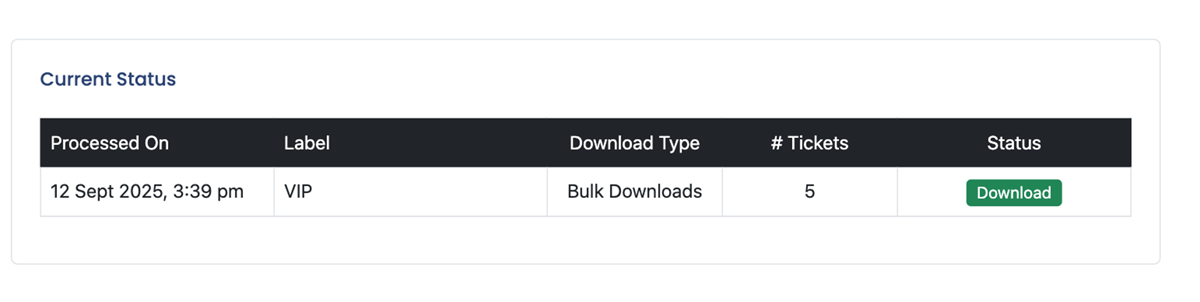
Process
The system prepares tickets in the background on the server. You'll receive a notification when they're ready, after which you can download them via the download button in the Current Status panel.
-
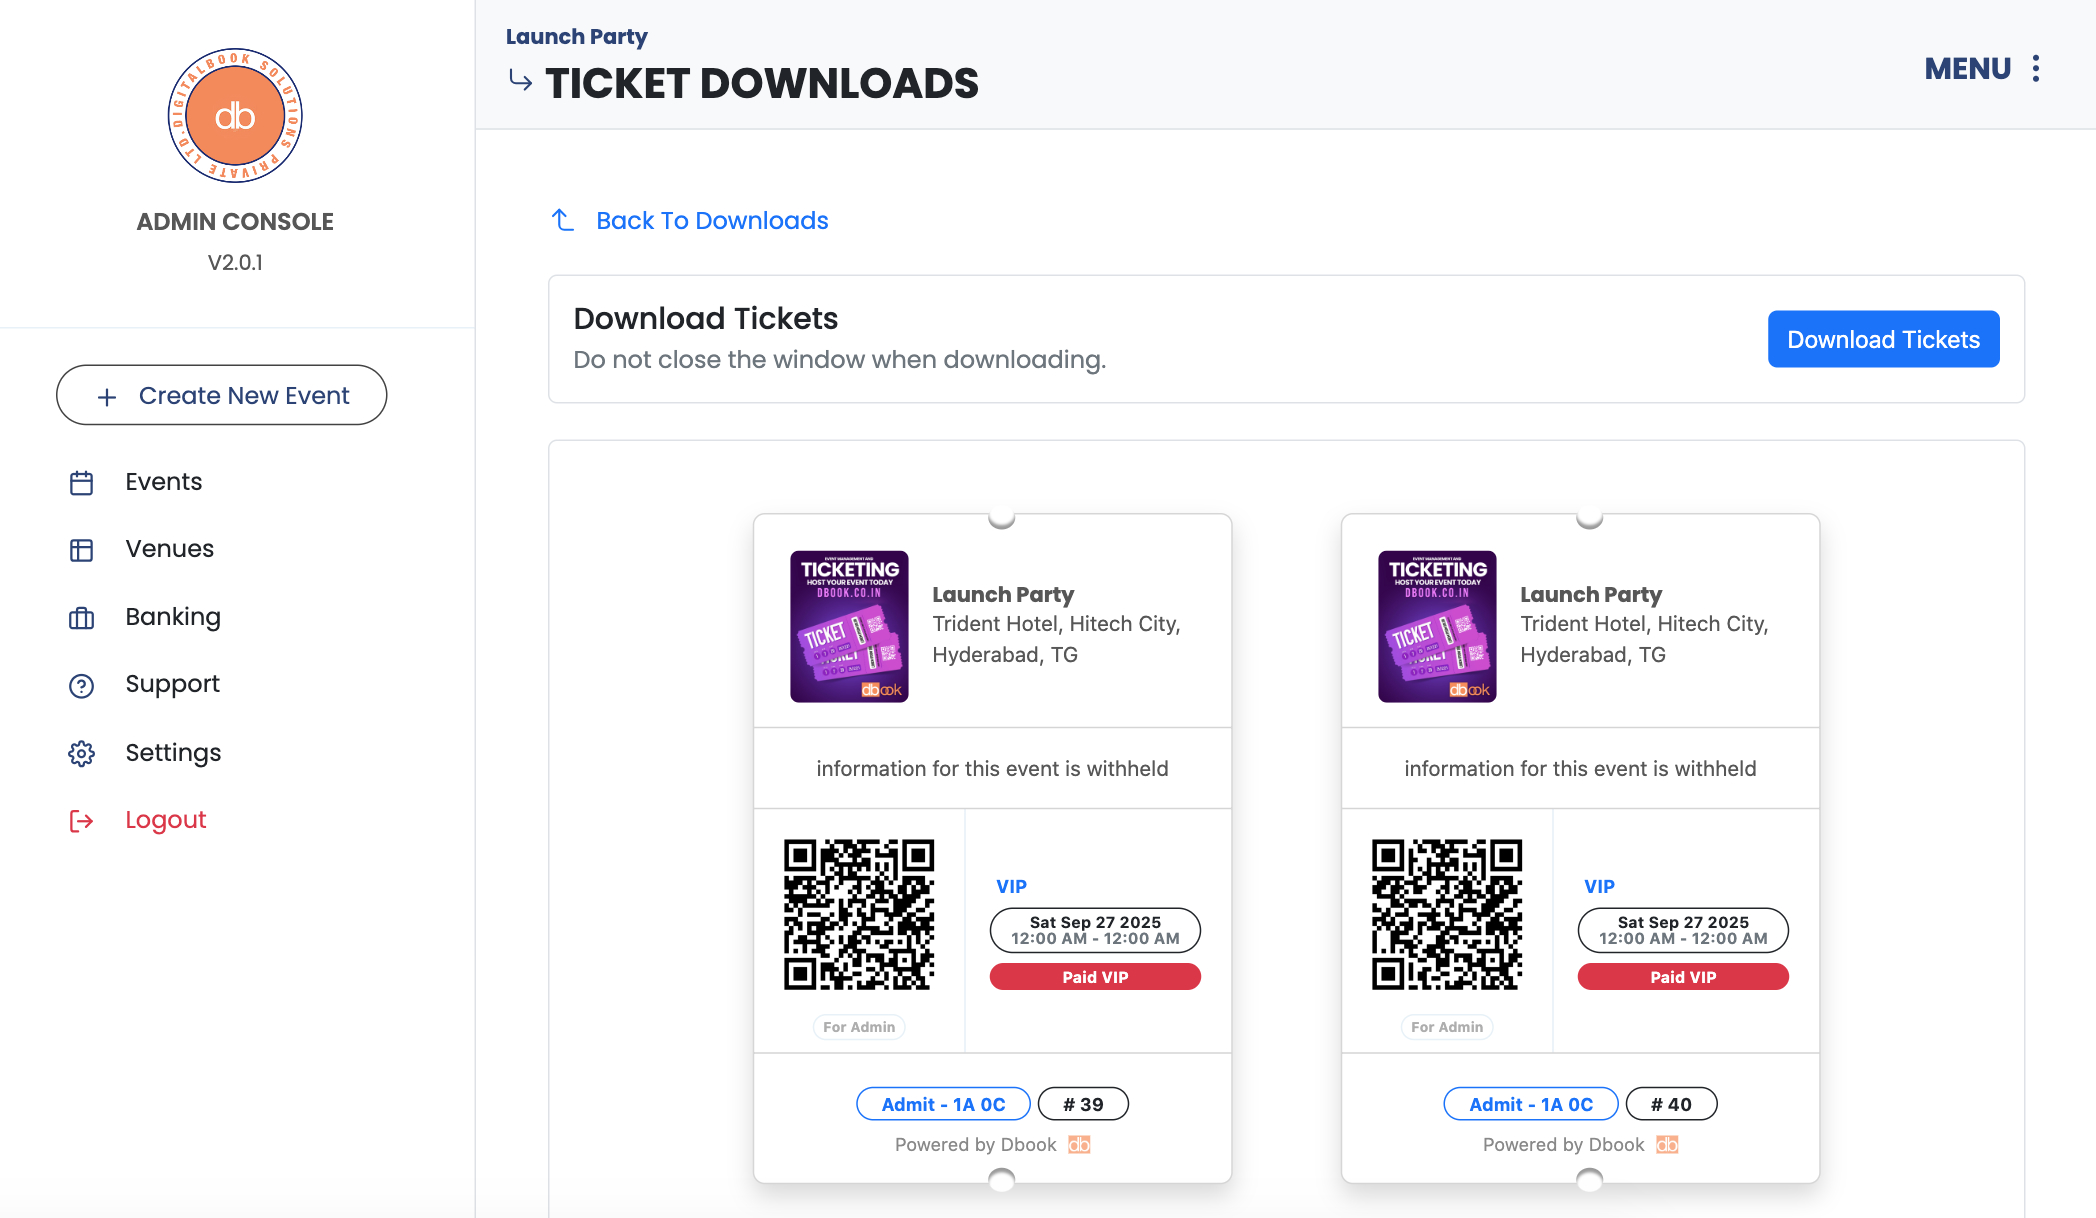
Download
Once you click the download button, you’ll be taken to a page where all tickets are being prepared. Simply click the download button on that page to download all tickets as JPG files in a ZIP archive.
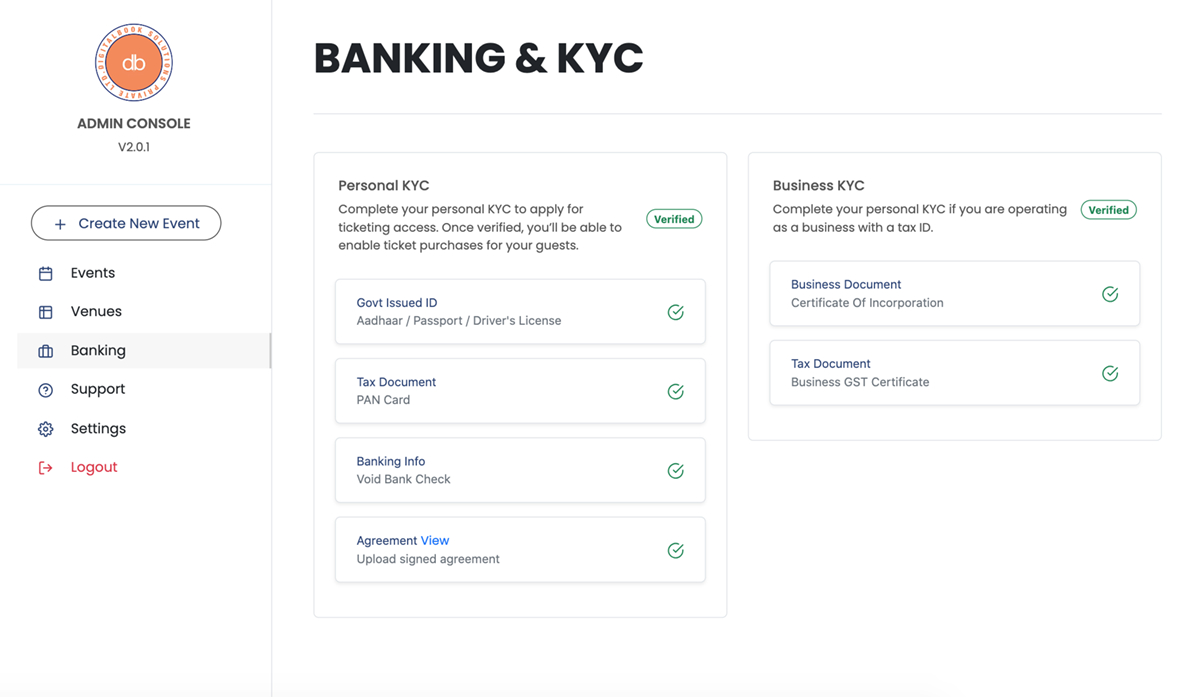
6. Enable Ticket Sales
To enable ticket sales on the Dbook platform, users must complete KYC/KYB verification or both depending upon the type of user.
-
Navigate to banking Tab
Go to banking tab in the left nav panel and update the necessary KYC.
-
Upload a signed agreement
Click the view link to download the agreement PDF. Print it, fill in the details, sign it, and upload the completed document to the KYC section. Pricing and Dbook fees will be mentioned in the agreement document.
Business customers must upload all the documents listed under PERSONAL KYC and BUSINESS KYC.
Advanced
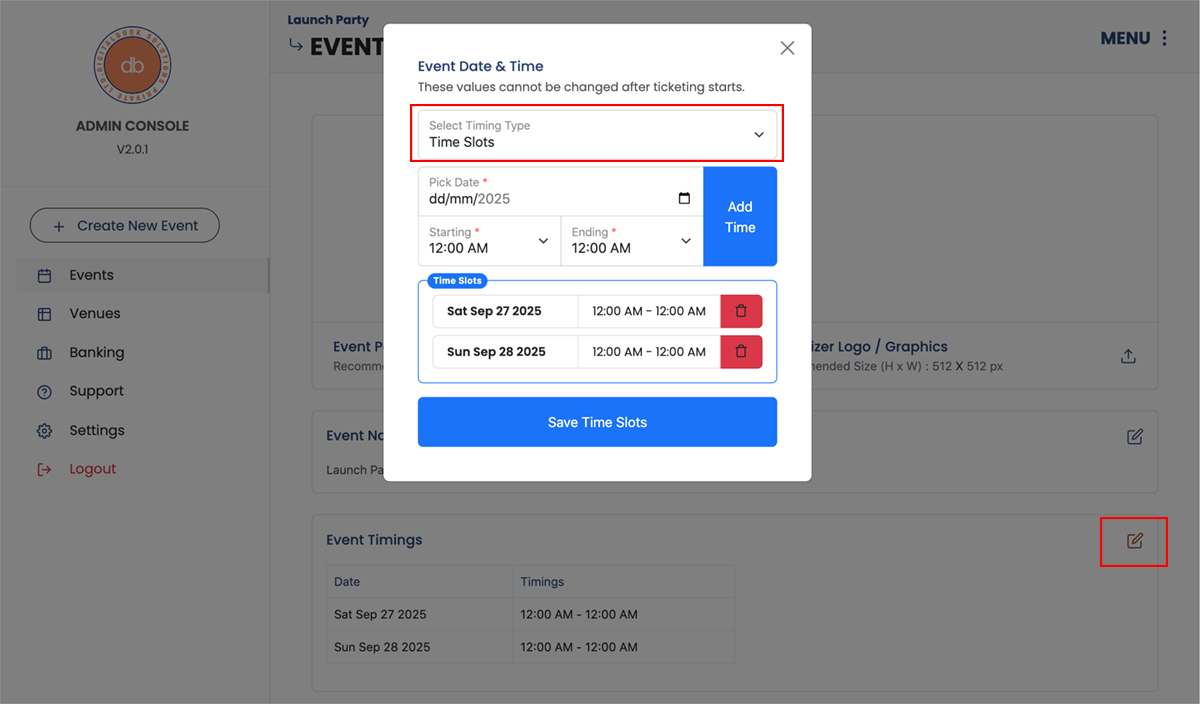
1. Timeslots
Change the single time to time slots.
-
Navigate to Event Info page
If your event has multiple time slots and multiple days, you can edit the timings on the event info page.
2. Ticket Pricing & Coupons
This is applicable when the ticket sales is enabled.
-
Navigate to Category & Pricing
There are two sections here. Once is to add pricing and another one is to add coupons
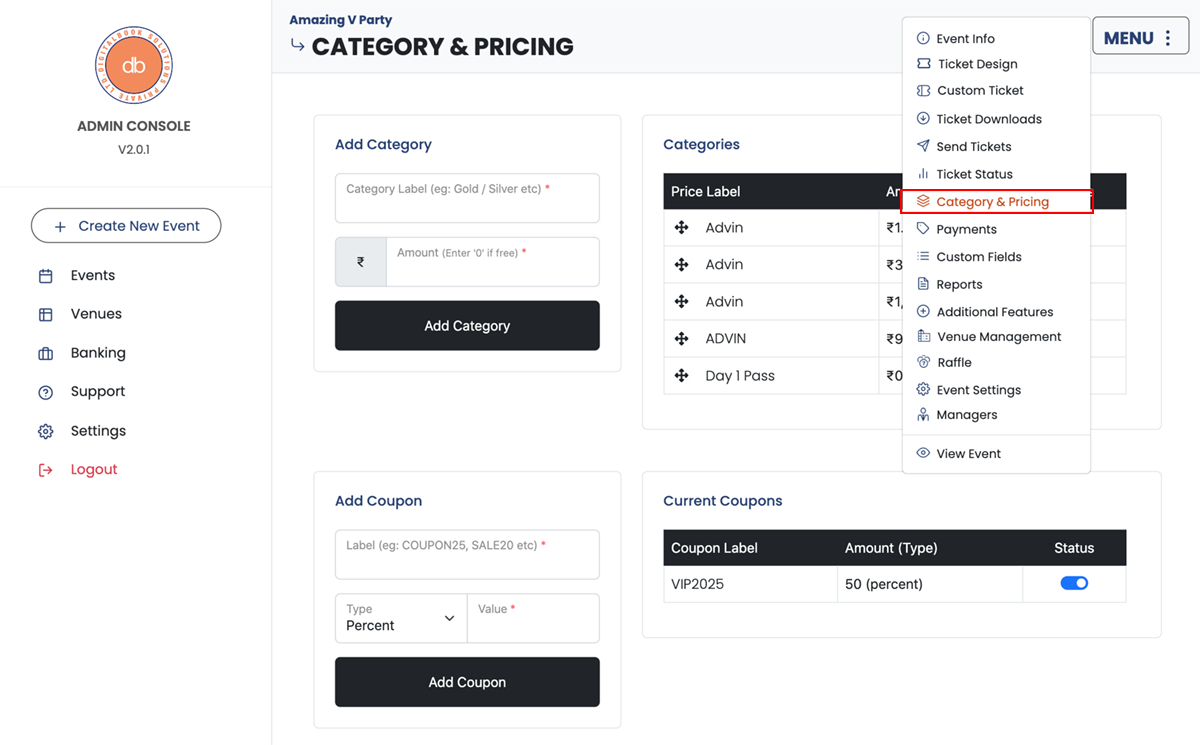 Pricing & Coupons once added cannot be deleted but can be disabled
3. Ticket Locking
This innovative feature is designed to prevent unauthorized entry and safeguard the legitimate ticket owner.
-
Download Dbook App
Login as "Attendee" select the appropriate ticket and push the "Lock My Ticket" to lock the ticket.
-
Entry
The ticket is only valid when the same device is used to validate the ticket with QR code.
This feature is only availalbe when the event admin enabled the option. This way even if the QR code is duplicated, it will not work!
